Adding a Printer from Scripps Printing Services
- Shan Poon
- SIOIT Student
- Chadwick, Robyn (Unlicensed)
Contact Info
Scripps IT Help Desk
Email: siohelp@ucsd.edu
Phone: 858-534-8484 (on-campus x48484)
Scripps Printing Services | ||||||||||||
sioprint.ucsd.edu hosts shared printing for different departments at Scripps. A username and password is required for printing. All print jobs are logged for accounting purposes. Scripps printing services are restricted to the campus network. Computers must be connected to UCSD-PROTECTED, campus ethernet, or the UC San Diego VPN to use this service. All printers have the option to both in color as well black and white, unless otherwise noted. List of supported printers and locations.
**prints only in black and white | ||||||||||||
| ||||||||||||
Follow these instructions to add your department's printer to your computer. |
Instructions for Mac OS 10.8 and newer
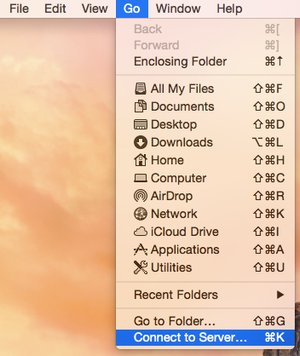
In Finder, click on the Go menu -> Connect to Server
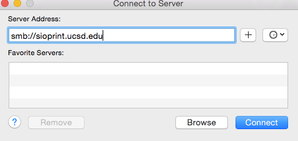
Enter smb://sioprint.ucsd.edu for Server Address and connect
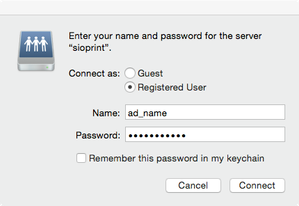
- When prompted to login, use your Active Directory login (the first part of your official email address before the @, e.g. username@ucsd.edu, same password you use for UCSD email)
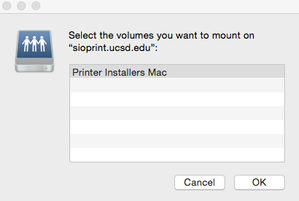
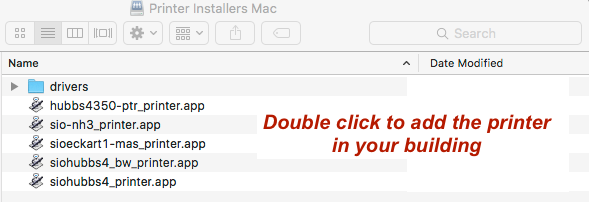
- Select Printer Installers Mac, click OK
- Double click on the printer which matches your building name (e.g. HUBBS will be siohubbs4; refer to printer locations and names)
- You may be prompted to enter your computer's administrator password. If you are not an administrator on your computer, please contact Scripps IT Help Desk for assistance.
- Print a test page to the new printer
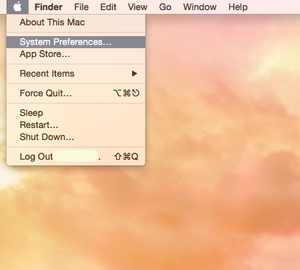
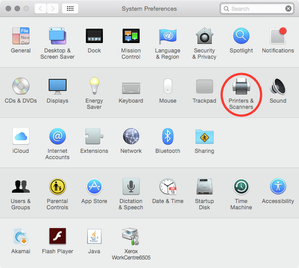
- Open System Preferences, Printers & Scanners
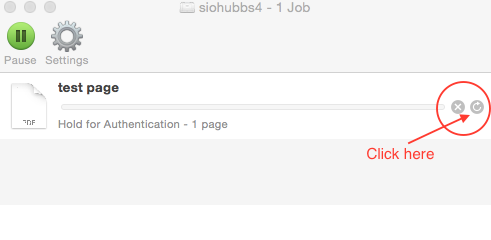
- In the printer list on the left, select the printer you just printed to. Click Open Print Queue...
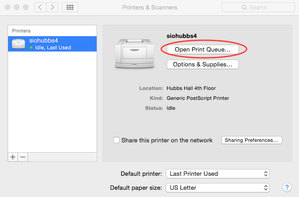
- Look for the test page (it should say Hold for Authentication); Click the refresh button on the far right.
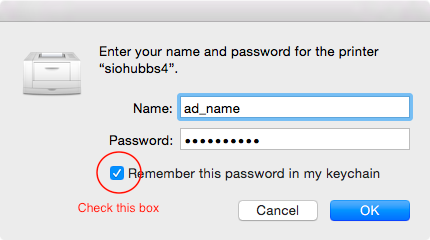
- Enter your AD login, check the box for Remember this password..., click OK.
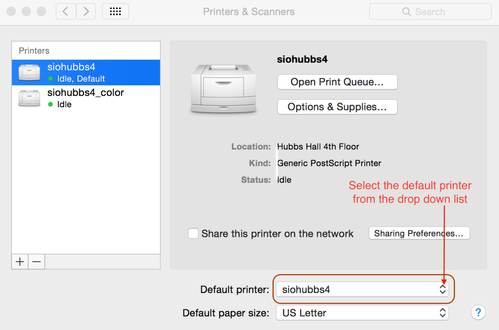
- Set the default printer in Printers & Scanners
Instructions for Windows 7 and newer*
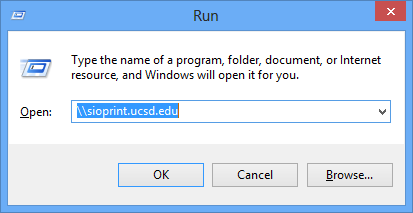
- In the Start menu, type in run, hit the enter/return key
- In the Run box, enter \\sioprint.ucsd.edu (if your computer is part of the UC San Diego Active Directory, skip step 3)
- When prompted to login, use ad\username (username is the first part of your official email address before the @, e.g. username@ucsd.edu, same password you use for UCSD email)
Check the box for Remember my credentials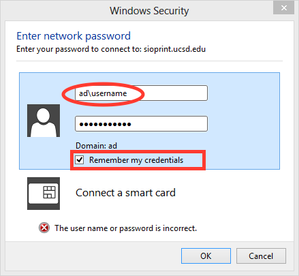
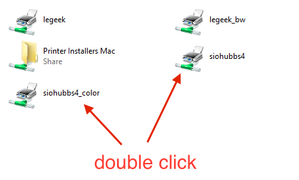
- Once connected, window will show a list of printers, double click the printer corresponding to your building (e.g. HUBBS will be siohubbs4; refer to printer locations and names).
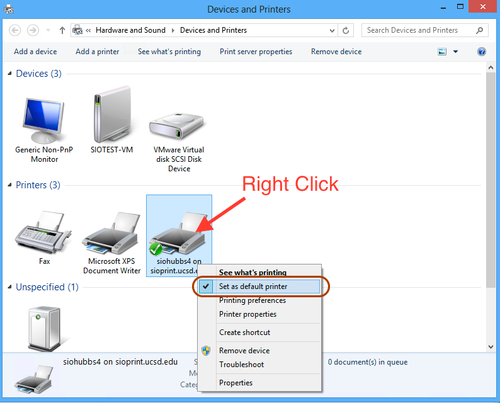
- Set the printer as default printer in Devices and Printers control panel.
* Repeat these steps for EACH user account on a Windows computer
Related articles