Configuring Linux Printing for sio-nh3(Nierenberg Hall) using GUI tools
Contact Info
Scripps IT Help Desk
Email: siohelp@ucsd.edu
Phone: 858-534-8484 (on-campus x48484)
This guide was created for RedHat Enterprise Linux(RHEL) 7.2, and should be applicable to CentOS 7.2. While the steps may be similar, the appropriate steps may differ if your version or distribution of linux differs.
Step-by-step guide
Below is a detailed guide to setting up the sio-nh3 printer for your linux workstation . BEFORE following this guide you'll need to install the drivers.If you're comfortable installing an rpm that contains the drivers, you can download the Xerox WorkCentre 6505DN print driver rpm and install it. Otherwise see our detailed guide Installing Linux Drivers for Xerox WorkCentre 6505DN.
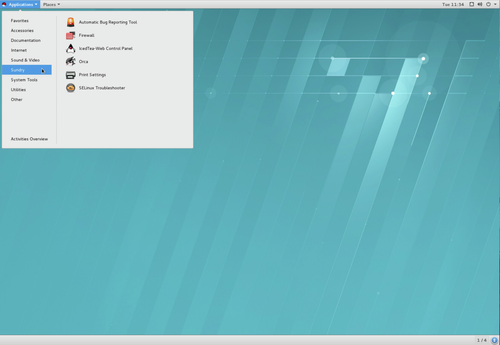
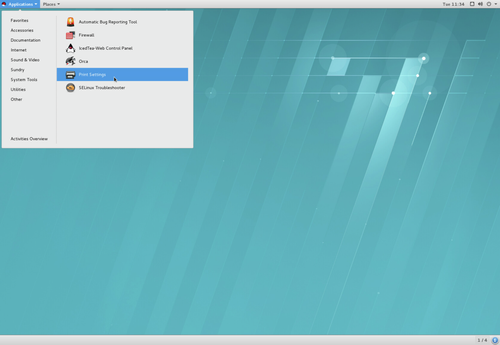
- Navigate to Applications->Sundry
- Select "Print Settings"
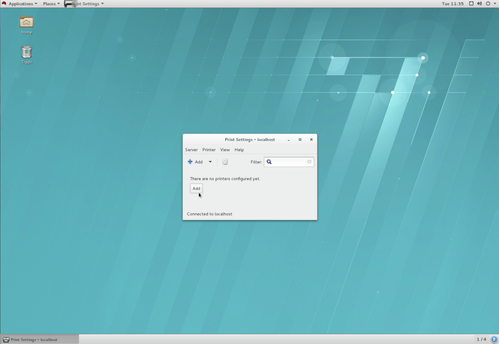
- When the Print Settings windows appears, click Add
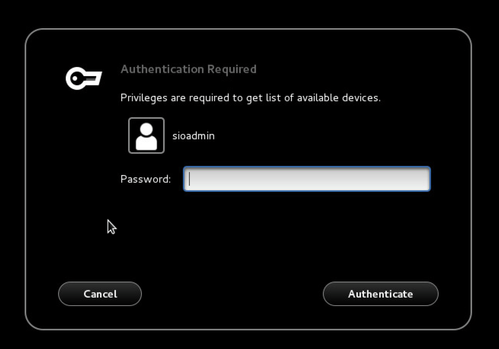
- You will need to provide an administrator password, and click "Authenticate"
The "New Printer" window will appear. Confirm that you have selected "Enter URI" on the left sidebar. Enter the following URI:
smb://sioprint/sio-nh3and then click "Forward"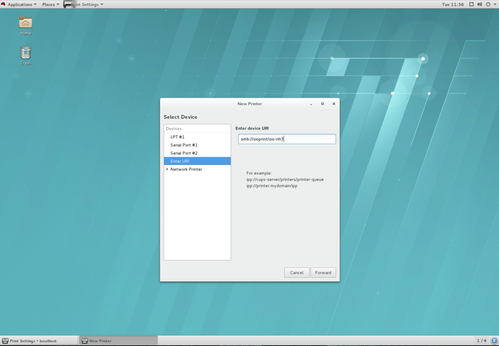
You will now want to select the printer from a database. Scroll down to "Xerox" and click "Forward"
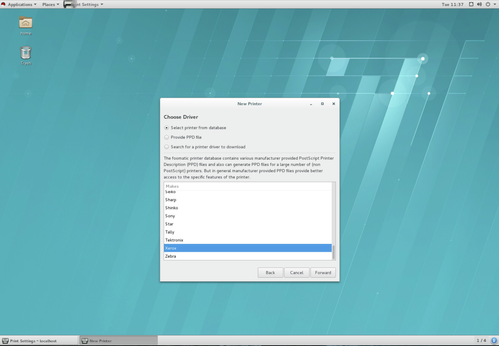
Select the "WorkCentre 6505DN" model

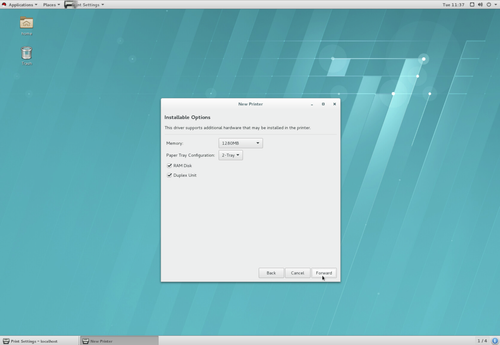
Use the default installable options and click "Forward".
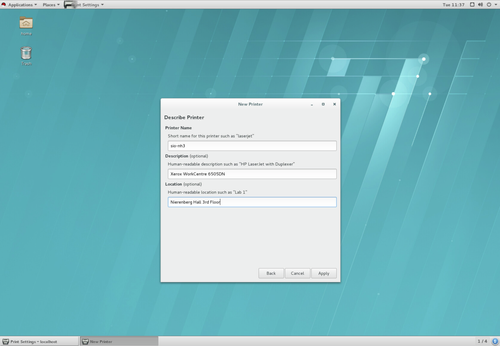
- Enter some meaningful description. These values are up to you, but see the screenshot below for suggested values. Click "Apply".
- You will be asked if you want to print a test page. DO NOT PRINT A TEST PAGE YET. Press Cancel.

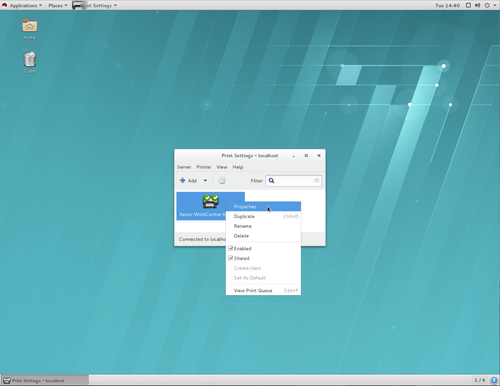
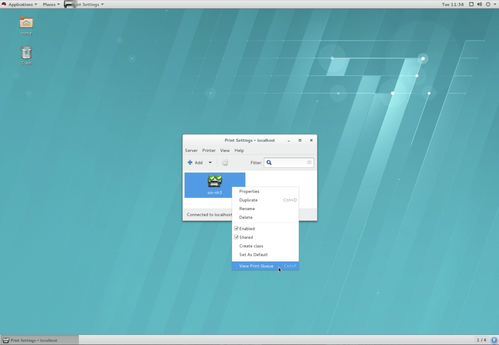
- Right-click on your newly added printer and select "Properties"
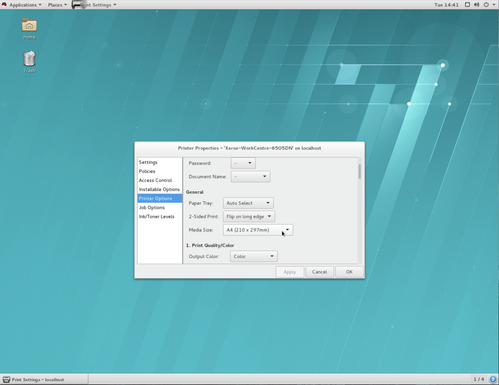
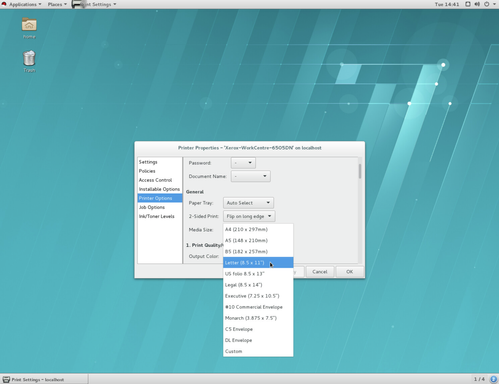
- Select "Printer Options" from the left sidebar and find the "Media Size" option.
- Change the "Media Size" to "Letter" and press "Apply". It is very important that you do this before printing, as trying to print using an unavailable paper size will lock up the printer until the job is cleared from the printer
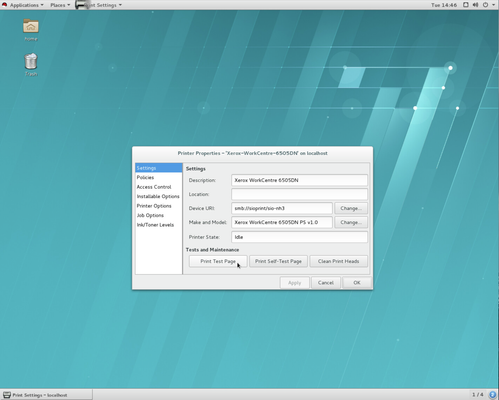
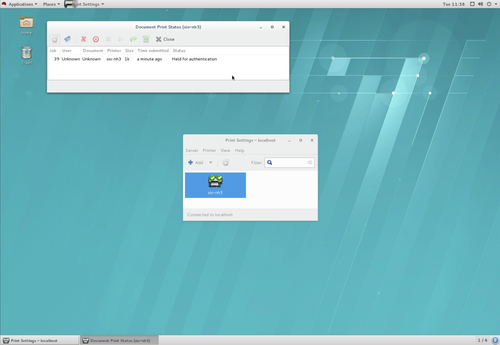
- You can now select "Settings" from the left sidebar, and click on the "Print Test Page" button and press "OK"
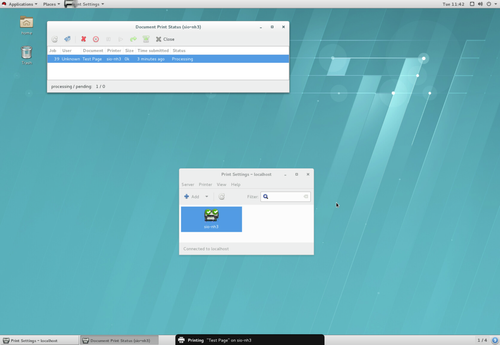
- Right-click on the printer icon again and select "View Print Queue" (Ctrl+F)
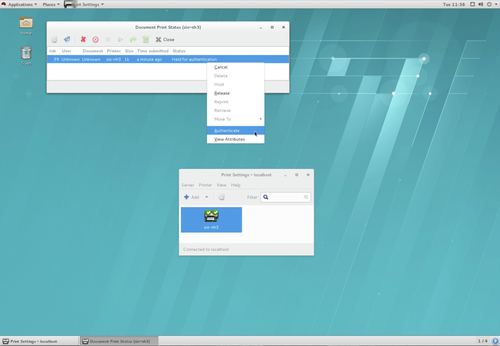
- The status of your test page should say "Held for authentication"
- Right-click on the print job, and select "Authenticate"
- You will be prompted for a username and password. Type
AD/your_ad_usernamewhereyour_ad_usernameis replaced by your login name in the Username field. You must preface your username with the textAD/for the authentication to work properly. Nex enter your AD password in the Password field and click "OK".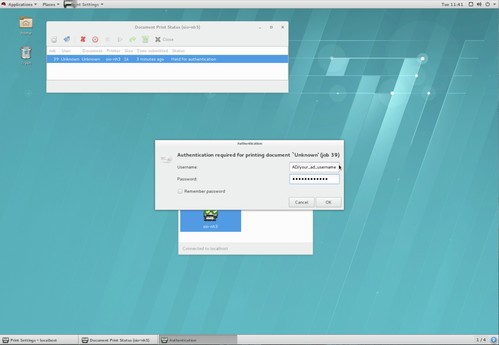
- If everything is setup properly, the status should change to "Processing" and you may see a notification towards the bottom of the screen.
- After the print job has been processed and successfully sent to the printer, it will disappear from your queue. You should now be able to collect your test job from the printer as well as print any further documents! You may also see a "Printing completed" notification towards the bottom of the screen.
If you did not check the "Remember password" option when you authenticated the test print job, you will have to authenticate future print jobs.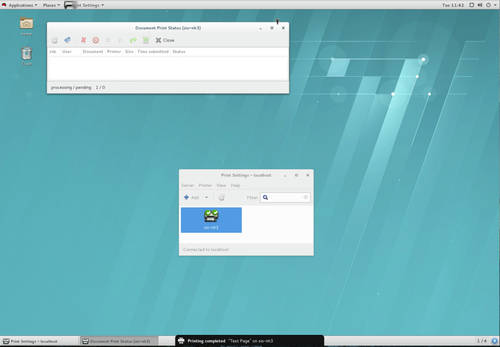
Related articles