SIO Printing Services | ||||||||||||||||||||||||||||||||||||
sioprint.ucsd.edu hosts shared printing for each department. Authentication is required for printing. All print jobs are logged for accounting purposes. | ||||||||||||||||||||||||||||||||||||
Below you will find instructions to adding the printer to your computer*. If you have troubles with printing, please contact the Scripps IT Help Desk: siohelp@ucsd.edu | ||||||||||||||||||||||||||||||||||||
The following is a list of supported printers and locations.
|
* printing is restricted to campus network, you must be connected to UCSD-PROTECTED or campus ethernet when adding printer or printing.
Instructions for Mac OS 10.8 and newer
- In FInder, click on the Go menu -> Connect to Server
Enter smb://sioprint.ucsd.edu for Server Address and connect
- When prompted to login, use your AD login (usually the first part of your email address, and your email password)
- Select Printer Installers Mac, click OK
- Double click on the printer which matches your building name (e.g. Hubbs will be siohubbs4; refer to the table above for the printer names)
- You may be prompted to enter your computer's administrator password. If you are not an administrator on your computer, please contact Scripps IT Helpdesk for assistance.
- Now print a test page to the printer you just added
- Open System Preferences, Printers & Scanners
- Select the printer you just printed to. Click Open Print Queue...
- Look for the test page (it should say Hold for Authentication); Click the refresh button on the far right.
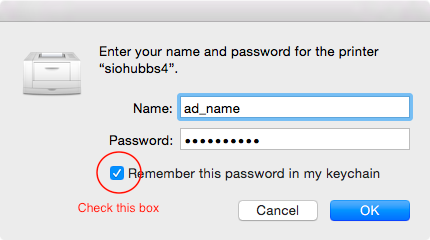
- Enter your AD login, check the save password box, click OK.
Instructions for Windows 7 and newer
...


